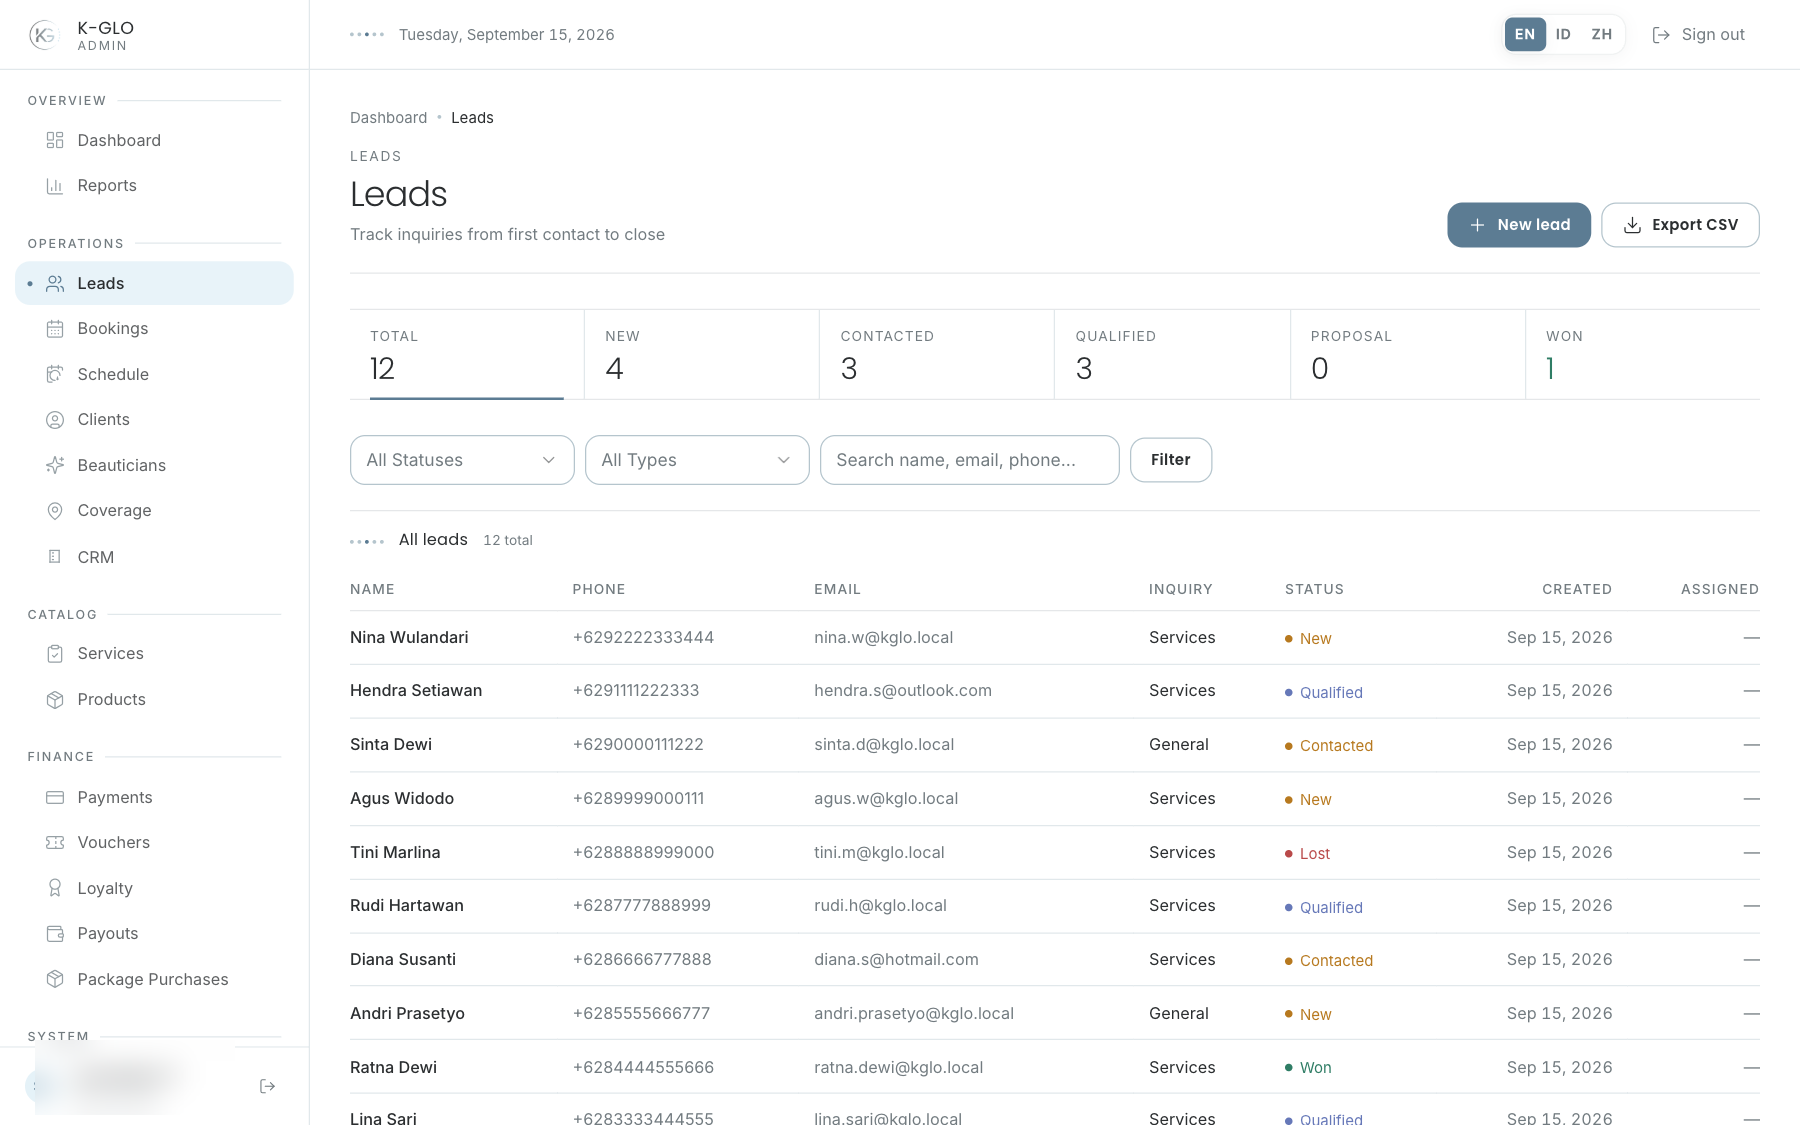
List and filters
Search by lead name/contact, choose an inquiry type, or filter by status. Apply filters with Filter; they are retained in CSV exports. There is no assignment filter on the list; assign owners from the lead detail page.
Create a lead
- Select Create lead.
- Enter the name and contact information; inquiry type and status have defaults, while the message and attribution fields can be filled when available.
- Save and check the result.
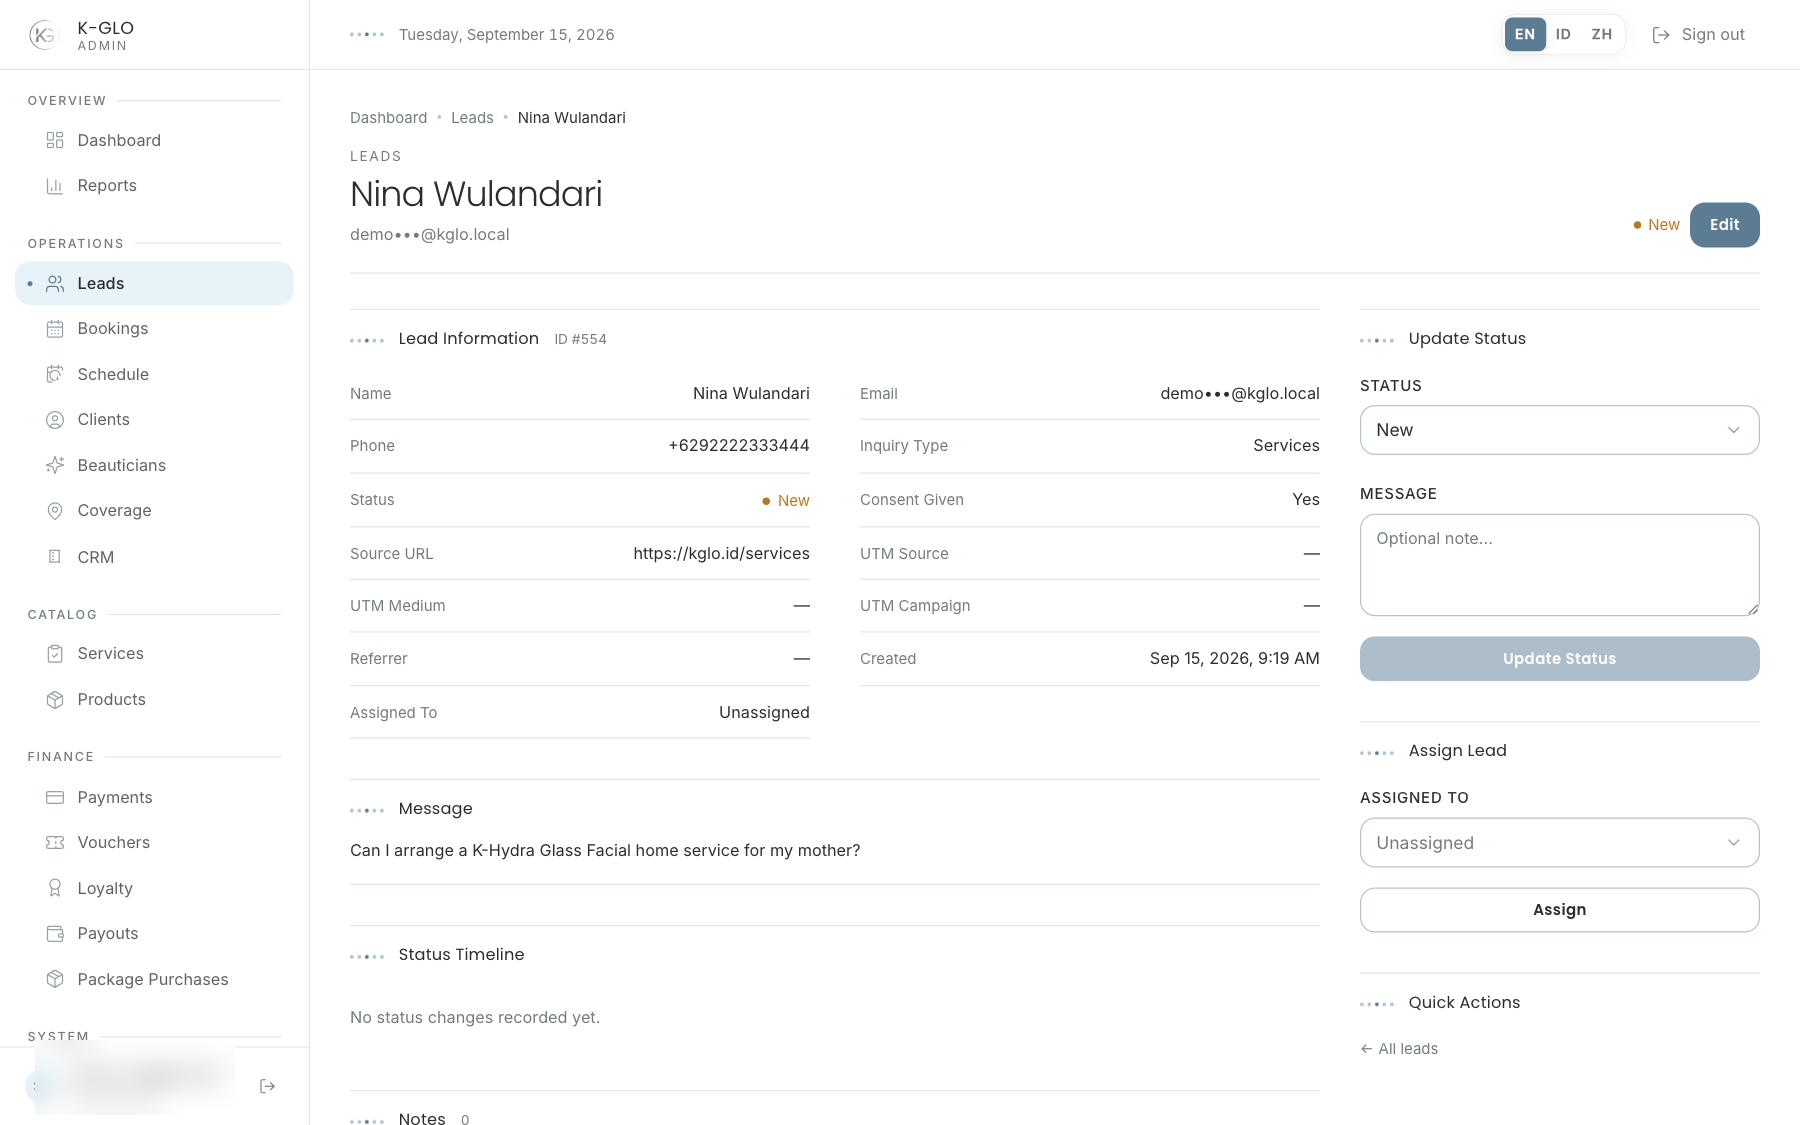
- Open the detail page to assign an owner and follow up.
Follow up a lead
Use the inspector rail to assign an owner and update the status. Add notes for new context. Notes are append-only, preserving the follow-up history.
Read the timeline before making a change. Make sure the new status matches the latest interaction, and do not use a status as a substitute for a note.
Video walkthroughs
English Admin Web recordings from isolated demo data, slowed down so the steps are easier to follow. Secret values are masked. No external payment or provider delivery is performed.
Recorded:
admin creates a lead, updates its status, assigns it, and records a note 0:11
Covered steps
- Create a lead with name, email, phone, inquiry message, source URL, and UTM attribution.
- Update status with a status note, assign an admin owner, and append a follow-up note.
- Filter the lead list by status, inquiry type, and search; export the filtered CSV.
- Edit the lead and verify the saved name.